

Data Purge
Purge lets you permanently delete data that is no longer needed: imports from a period and reconciliations with no data that were left open and unused. By removing what is no longer relevant, you free up storage space on the platform and comply with your company’s data retention policy.
Because it permanently deletes data, this action is irreversible. Use it carefully and make sure what you are removing is no longer needed before confirming.
What happens to purged data
After purging, the data can no longer be accessed. It is important to understand the effects in each case:
Imports: the imported data and the reconciliation data linked to it are deleted. The execution remains listed in import management, which shows whether the data was purged but does not display the data itself.
Reconciliations: when you open a reconciliation analysis for a purged date, the data does not appear. Purging reconciliations removes the analysis, its tasks and notifications, and all related records, keeping only the creation record in the Audit Trails.
Before you begin
Access is usually restricted to administrators. Before purging, confirm that the data will truly no longer be needed, since there is no way to undo this action.
Data Purge is located at the end of the Old Processes section in the Admin Menu. The section name comes from the old screens being retired, but purging remains active. In some environments, this section is disabled; if it does not appear for you, contact support.
When you confirm, the platform asks for your password. In environments with the company’s single sign-on (SSO), you type the word PURGE instead of your password.
Viewing purges
Click the gear icon in the upper-right corner, and in the Admin Menu, select Old Processes → Data Purge.
The screen opens to the history of completed purges, showing who initiated each one, the affected period, the total number of imports, the Status, and the % Complete. Use the Purge Date (from), Purge Date (to), and Status filters to find a purge, and Refresh to track its progress.
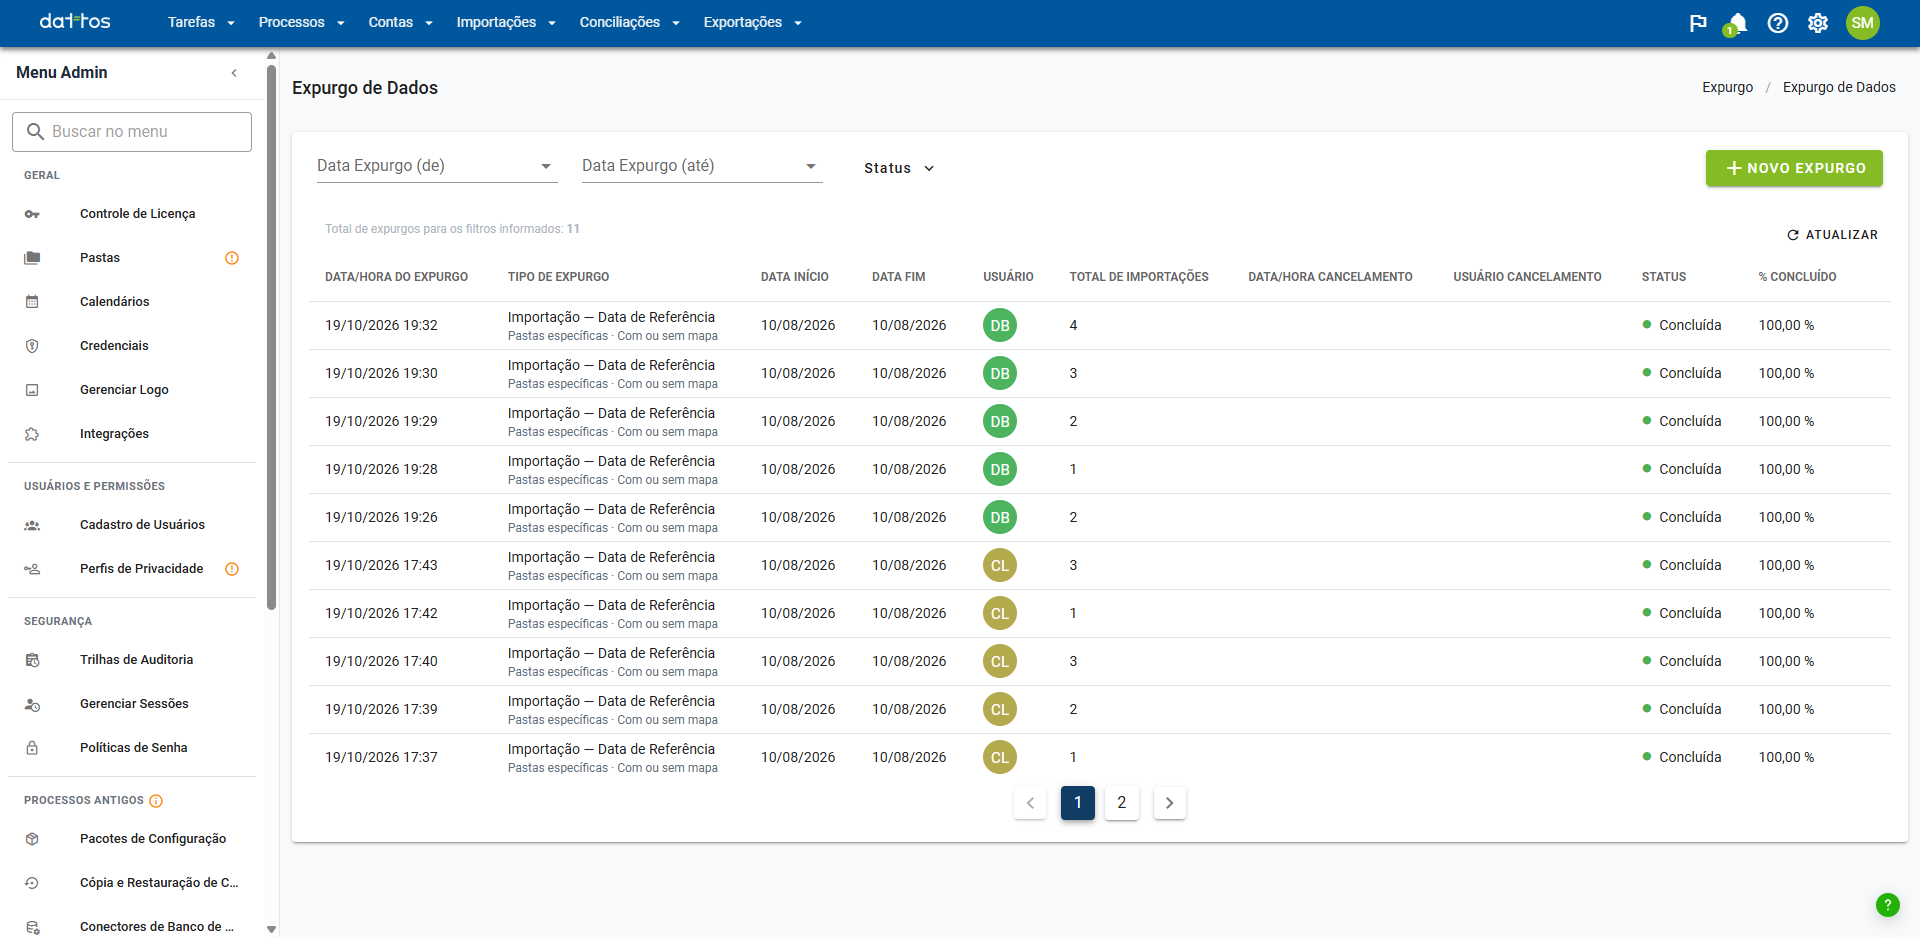
The purge runs in the background. A purge with Error status may have removed some of the data; check the % Complete.
Performing a new purge
Click New Purge.
Enter the criteria (described below) and click Search.
Check how many imports were found and the sample of data that will be removed. To change the criteria, click Back.
Click Start Purge. The Data Purge Confirmation window warns that the operation is irreversible: enter your password (or PURGE in environments with SSO) and click Confirm. To cancel, click Cancel.
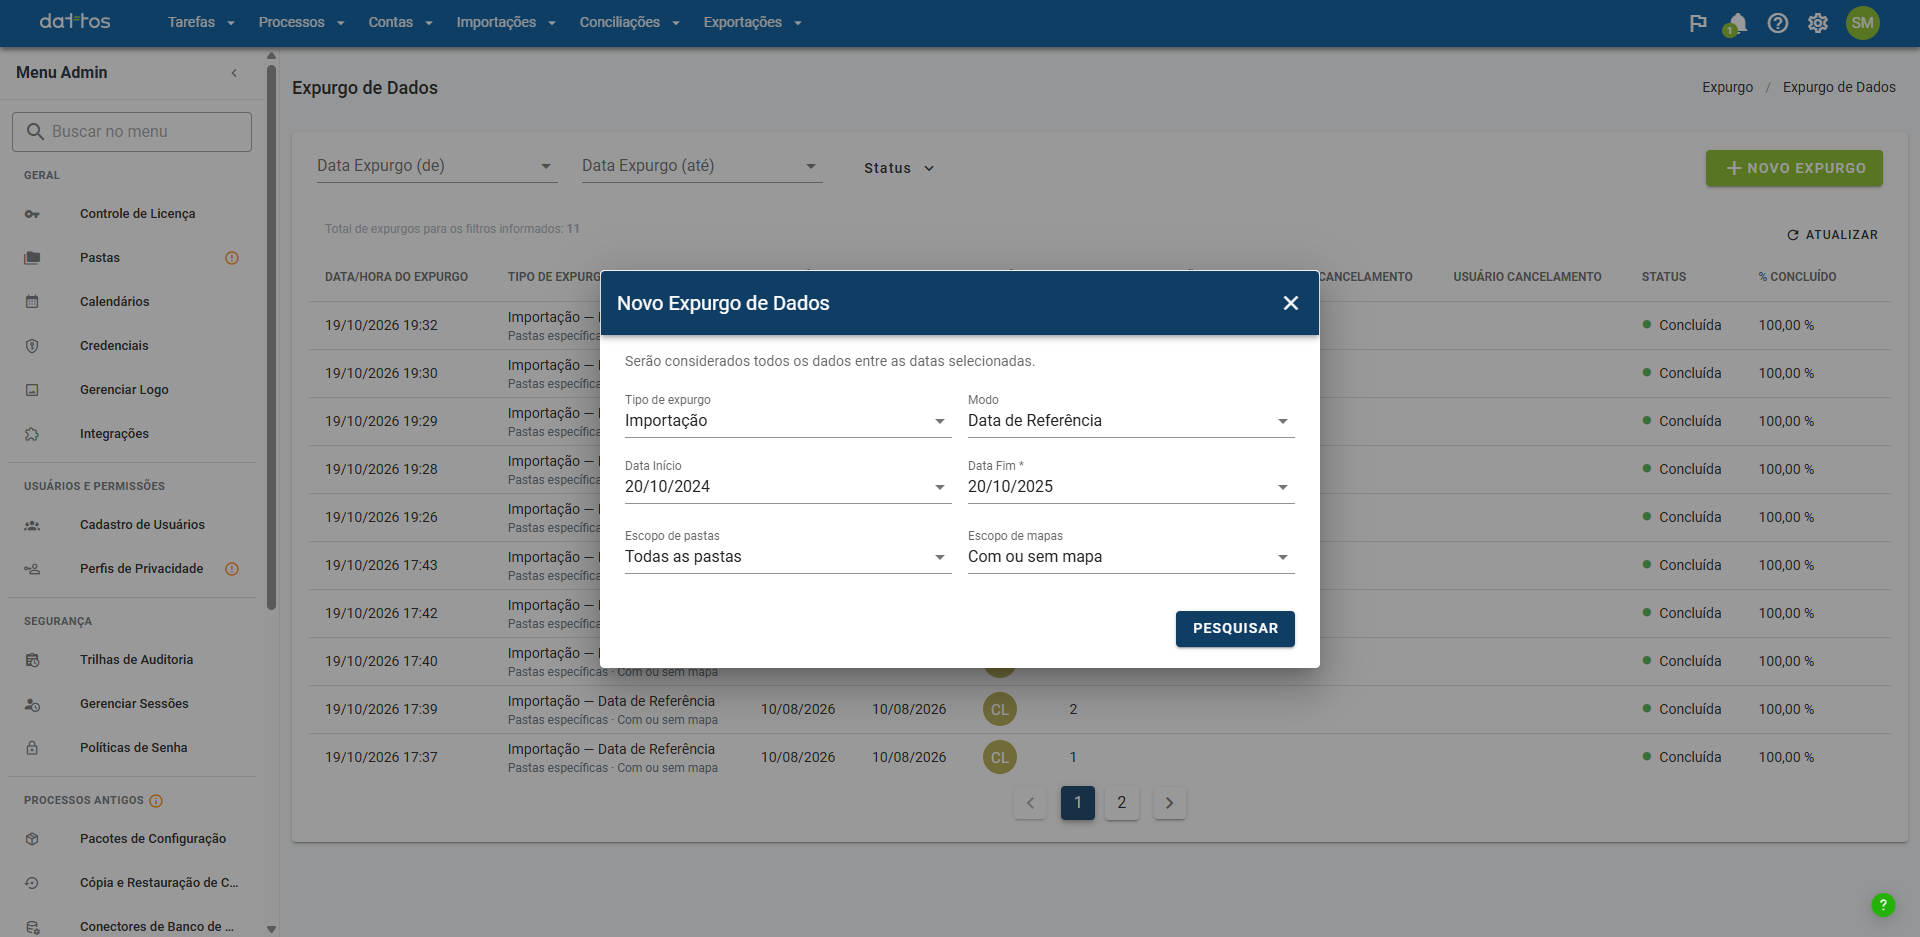
In the New Data Purge window, enter:
Purge type: Import or Reconciliation.
Mode (only for the Import type): which date the platform compares with the period. Reference Date is the period selected during the import; Import Date is the day the import took place. The same period affects different data depending on the mode.
Start Date and End Date: the data period. The End Date is required, and both dates are prefilled with a default range, so check them before searching.
Folder scope: All folders or Specific folders. With specific folders, you select one or more folders and can include their subfolders.
Map scope: limits the purge based on its association with reconciliation maps. For the Import type: With or without a map, With any Map, With specific Maps, or Without a Map. For the Reconciliation type: With any Map or With specific Maps.
Tip: the table displayed after searching is only a sample. The volume that will be removed is the number of imports shown in the text above it. To avoid affecting data from other areas, prefer Specific folders over All folders.
Important: once confirmed, the data is permanently removed and can no longer be used.